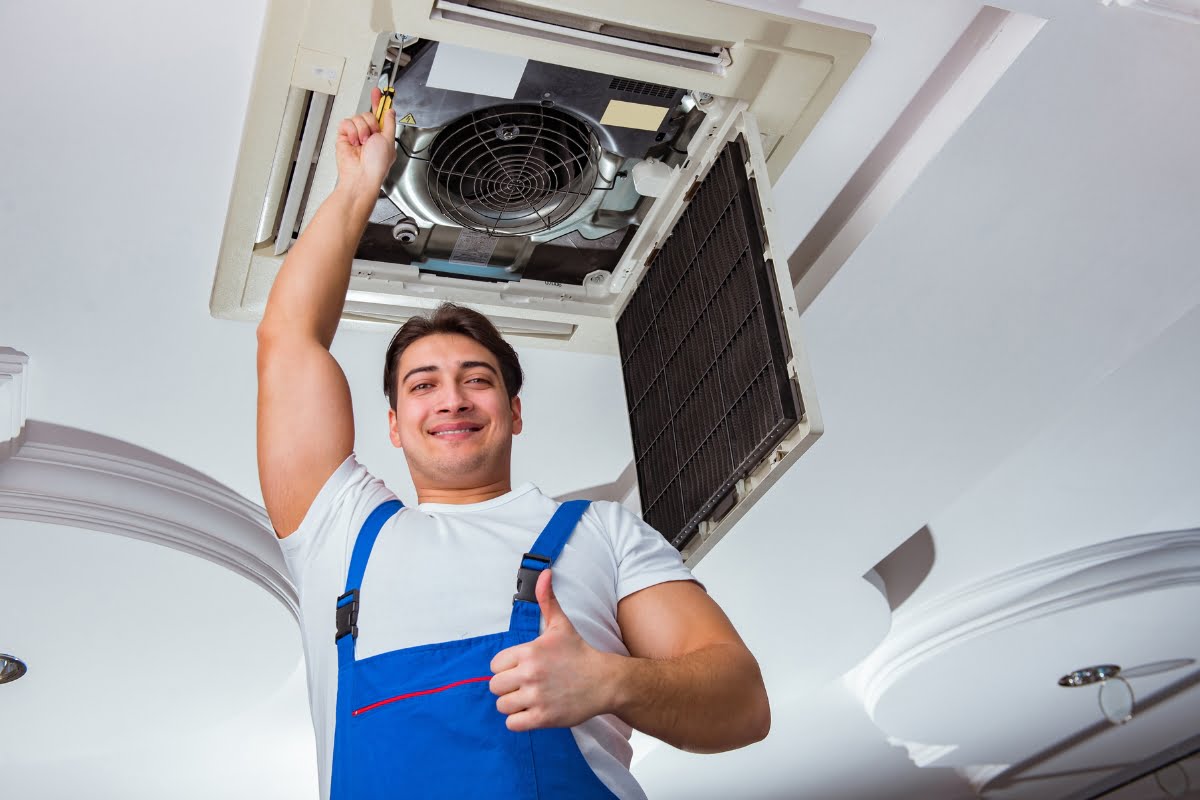
Have you considered the impact of the winter weather on your HVAC system? Just like any other machine, it requires regular maintenance to keep it running smoothly, especially during the colder months. So today, we will delve into the importance of winter HVAC maintenance and provide you with valuable tips to ensure your system performs optimally throughout the cold season.
Just as you prepare your home for the winter by sealing drafts and insulating windows, your HVAC system also needs some TLC to withstand the harsh cold. So, let’s dive in and discover how you can give your HVAC system the love and care it deserves during the winter months.
Winterize Your HVAC System!
Checking And Adjusting Thermostat Settings
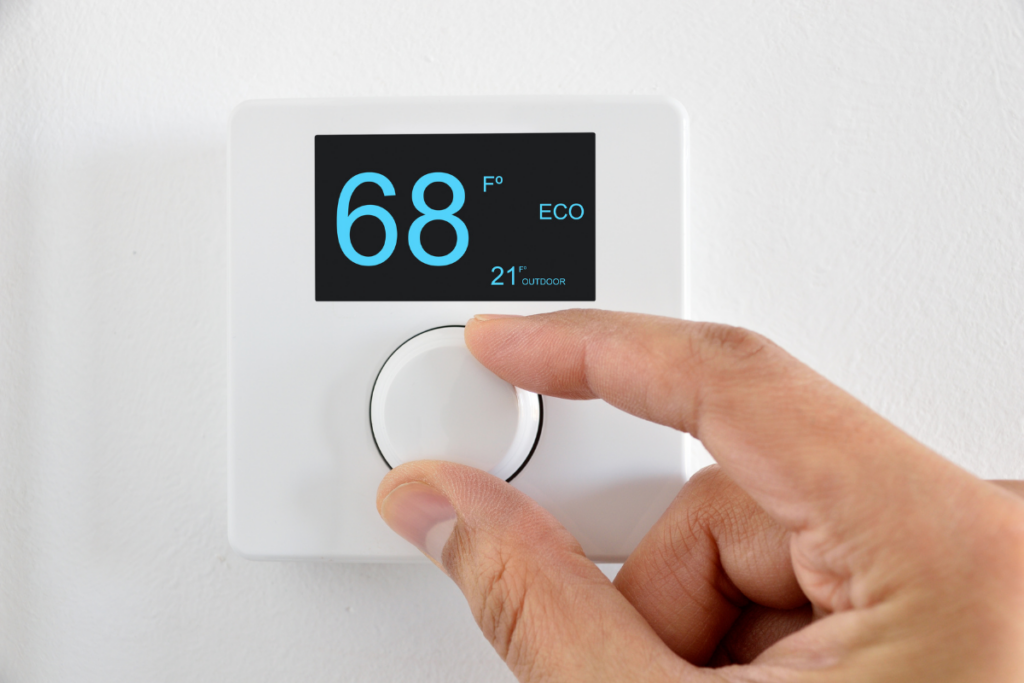
As winter approaches, it’s crucial to ensure that your thermostat settings are properly adjusted to keep your home warm and comfortable. Here are some steps you can take to check and adjust your thermostat settings for the winter season.
- Start by Turning Off Your HVAC System: Before making any adjustments to your thermostat, it’s important to turn off your heating, ventilation, and air conditioning (HVAC) system. This will prevent any accidental changes in temperature while you are working on the settings.
- Check the Current Temperature Setting: Take a look at the current temperature setting on your thermostat. It’s recommended to set the temperature between 68 and 72 degrees Fahrenheit (20-22 degrees Celsius) during the winter months for optimal comfort and energy efficiency.
- Consider a Programmable Thermostat: If you don’t already have one, consider upgrading to a programmable thermostat. These thermostats allow you to set different temperatures for different times of the day, ensuring that your home is heated efficiently when you are most in need of warmth. This can help you save on energy costs as well.
- Adjust the Temperature Schedule: If you already have a programmable thermostat, review and adjust the temperature schedule according to your daily routine. Lower the temperature when you are away from home or while you sleep, and increase it when you are awake and in need of warmth. This will help you conserve energy without sacrificing comfort.
- Check and Change the Batteries: If your thermostat is battery-powered, make sure to check the battery status and replace it if necessary. A low battery can cause your thermostat to malfunction or lose its settings, leaving you in the cold.
- Calibrate the Thermostat: Over time, your thermostat may become inaccurate, leading to temperature discrepancies in your home. To ensure accurate readings, consider calibrating your thermostat. You can do this by placing a reliable thermometer next to your thermostat and comparing the readings. If there is a difference, follow the manufacturer’s instructions to recalibrate the thermostat.
- Clear Any Obstructions: Ensure that there are no obstructions around your thermostat that could affect its accuracy. Keep it away from direct sunlight, drafts, or vents that could impact temperature readings.
- Consider a Smart Thermostat: For even more convenience and control, you may want to consider investing in a smart thermostat. These thermostats can be controlled remotely through your smartphone and can adapt to your lifestyle patterns, making adjustments automatically to provide optimal comfort and energy efficiency.
By following these tips for winter HVAC maintenance, you can check and adjust your thermostat settings for the winter season, ensuring that your home stays warm and cozy while saving energy and lowering your utility bills. Stay comfortable throughout the cold season with proper thermostat maintenance and adjustments.
Checking And Cleaning The Condensate Drain
Condensate drains play a crucial role in the functioning of HVAC systems, especially during the winter months. As temperatures drop, condensation increases, and it is essential to ensure that the condensate drain is clear and free from any blockages. Let’s dive into the steps you can take to check and clean the condensate drain for winter.
- Familiarize Yourself with the HVAC System: Before you start checking and cleaning the condensate drain, it’s important to be familiar with your HVAC system’s layout. Locate the condensate drain line and the access point. Typically, the condensate drain line is a PVC pipe that connects to the indoor air handler unit.
- Turn Off the HVAC System: To ensure your safety and prevent any accidental damage, turn off your HVAC system before you begin working on the condensate drain. You can do this by shutting off the power at the main electrical panel or by turning off the system from the thermostat.
- Locate the Condensate Drain Access Point: The condensate drain line is usually connected to an access point or a drain pan. Look for a T-shaped PVC fitting or a drain pan near the indoor air handler unit. This is where you’ll find the condensate drain entry point.
- Inspect for Blockages: Using a flashlight, visually inspect the condensate drain line for any visible blockages. Look for any debris, dirt, or algae buildup around the access point or inside the drain line. If you notice any obstructions, it’s time to clean the drain.
- Clean the Condensate Drain Line: To clean the condensate drain line, you can use a wet/dry vacuum or a simple homemade solution of vinegar and water. Attach the vacuum to the drain line or pour the vinegar-water mixture into the access point, allowing it to flow through the drain line and remove any blockages. Be cautious not to use excessive force, as it may damage the drain line.
- Prevent Future Clogs: To prevent future clogs, consider installing a condensate drain line trap or a condensate drain pan treatment. These measures help to prevent debris from entering the drain line and inhibit the growth of algae and mold.
- Check for Proper Drainage: Once you’ve cleaned the drain line, it’s crucial to check for proper drainage. Pour a small amount of water into the condensate drain access point and observe how it flows through the drain line. If the water drains properly, you can be confident that the condensate drain is clear.
- Schedule Regular Maintenance: To ensure your HVAC system runs smoothly in the cold season, it’s important to schedule regular maintenance with a professional technician. They will inspect and clean the condensate drain, as well as perform other necessary tasks to keep your system in optimal condition.
Checking and cleaning the condensate drain for winter is an essential part of winter HVAC maintenance. By following these steps, you can prevent potential issues such as leaks, water damage, and mold growth. Remember to prioritize safety and schedule professional maintenance to keep your HVAC system running smoothly throughout the cold season.
Inspecting And Sealing Ductwork
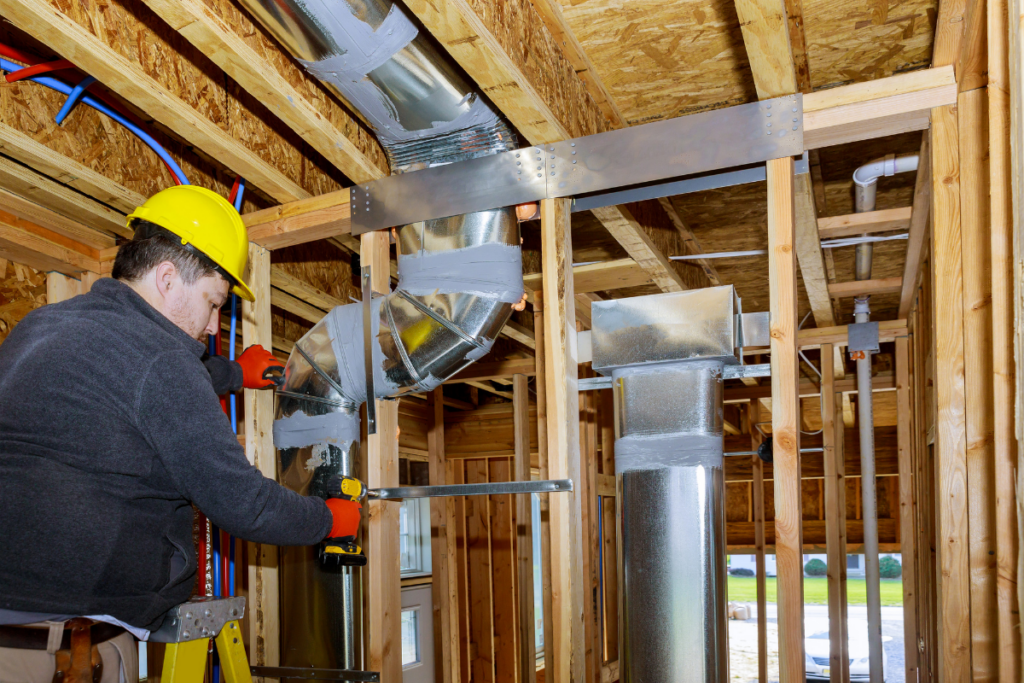
Inspecting and sealing your ductwork is an essential part of winter HVAC maintenance. By ensuring that your ducts are properly sealed, you can prevent heat loss and improve the efficiency of your heating system. In this article, we will provide you with a step-by-step guide on how to inspect and seal your ductwork for the winter season.
- Start by visually inspecting your ductwork. Look for any visible signs of damage, such as cracks or gaps. These can allow warm air to escape, leading to energy waste and a less comfortable home. Pay special attention to joints and connections, as these are common areas for leaks to occur.
- Once you have identified any potential issues, use a flashlight to get a closer look. Shine the light along the length of the ducts to check for any hidden leaks. Look for light coming through cracks or gaps, as this indicates a problem that needs to be addressed.
- Seal any visible gaps or cracks using a high-quality duct sealant. Apply the sealant generously, making sure to cover the entire area of the leak. Use a brush or your fingers to spread the sealant evenly and ensure a tight seal. Allow the sealant to dry completely before moving on to the next step.
- For larger gaps or cracks, consider using metal tape or mastic sealant. These products provide a more durable and long-lasting seal. Apply the tape or mastic over the damaged area, making sure to press it firmly into place. Again, allow the sealant to dry before proceeding.
- Insulate your ductwork to further improve its efficiency. Use duct insulation sleeves or wraps to cover the exposed sections of your ducts. This will help prevent heat loss and ensure that warm air reaches its intended destination.
- Finally, test your HVAC system to ensure that the repairs and sealing have been effective. Turn on your heating system and feel for any air leaks around the ducts. If you notice any drafts or cool spots, go back and recheck for any missed leaks. It may also be helpful to hire a professional HVAC technician to conduct a thorough inspection and make any necessary furnace repairs.
These steps for winter HVAC maintenance will not only help keep your home warm and comfortable but also save you money on energy bills. Don’t forget to regularly maintain and inspect your HVAC system to ensure it continues to run smoothly throughout the cold season. Stay warm!
Assessing And Improving Insulation
When it comes to preparing for winter, one important aspect to consider is assessing and improving insulation in your home. Proper insulation plays a crucial role in keeping your home warm and energy-efficient during the colder months. So with these winter HVAC maintenance tips, we will discuss some steps you can take to assess and improve insulation for the winter season.
- Conduct a Thorough Inspection: Start by inspecting your home for any areas that may need attention. Look for drafts around windows and doors, as well as any visible gaps or cracks in the walls. Check the attic and basement for insulation gaps or inadequate coverage.
- Seal Air Leaks: Air leaks can significantly impact the effectiveness of insulation. Use weatherstripping or caulking to seal any gaps around windows, doors, and other openings. This will prevent cold air from seeping into your home and warm air from escaping.
- Insulate Windows and Doors: If your windows are not properly insulated, consider using window film or applying weatherstripping to improve their efficiency. For doors, installing door sweeps or using draft stoppers can effectively seal gaps and reduce drafts.
- Check Attic Insulation: The attic is a common area where heat can escape. Assess the current insulation in your attic and determine if it needs improvement. Adding more insulation can help prevent heat loss and reduce energy consumption.
- Insulate Exterior Walls: In older homes or those with insufficient insulation, it may be necessary to insulate the exterior walls. This can be done by adding insulation material to the walls or using blow-in insulation. Consult with a professional to determine the best approach for your home.
- Insulate Pipes and Ducts: Insulating pipes and ducts are essential to prevent them from freezing or losing heat. Use pipe insulation sleeves or wrap them with heat tape. For ducts, consider insulating them with duct insulation to minimize heat loss during distribution.
- Consider Adding Insulation to the Basement: The basement is another area where heat can escape. Insulate the walls, floors, and ceiling of your basement to create a thermal barrier and keep the area more comfortable during the winter.
- Schedule HVAC Maintenance: As part of your winter HVAC maintenance, have a professional inspect and service your heating system. A properly maintained HVAC system will not only ensure optimal heating but also contribute to energy efficiency.
By assessing and improving insulation in your home as part of your winter HVAC maintenance, you can create a more comfortable environment and reduce your energy costs during the winter months. Take the necessary steps to seal air leaks, insulate windows and doors, and evaluate your attic, exterior walls, pipes, and ducts. Remember to schedule regular HVAC maintenance to keep your system running smoothly throughout the cold season. With these measures in place, you can enjoy a cozy and energy-efficient home all winter long.
Winter HVAC Woes? Fear Not! Get Expert Advice On Winter HVAC Maintenance

Winter can be a beautiful season with its frozen landscapes and cozy nights by the fire. But along with the enchantment, it also brings plummeting temperatures that can make your home feel like an icebox. That’s where your HVAC system comes to the rescue, ensuring a warm and comfortable environment for you and your loved ones.
So, don’t let the winter chill catch you off guard! Contact AD Campbell now and experience the peace of mind that comes with a well-maintained HVAC system. From thorough inspections to furnace and ac repairs, trust our Atlanta HVAC company to keep your system running smoothly, ensuring your home stays warm and comfortable throughout the season.
Stay cozy and worry-free this winter. Reach out to us for an HVAC service request and let our experienced professionals take care of your winter HVAC maintenance needs.